✅ Setting Up Your Facebook Business Assets with Websalve
To ensure smooth management of your Facebook Pages and Ads, here’s how we recommend setting up your accounts so Websalve can support you effectively:
Websalve will serve as your primary business partner on Facebook..
You should have your own Business Manager account..
Within your Business Manager, you should have:
This setup ensures that issues with ads (e.g., disapprovals, account reviews) in one business do not affect your other businesses or locations.
If you don’t already have a Business Manager, we recommend creating one for each business entity.
⚠️ You can only create two Business Managers from your personal account, so if you need more, Websalve may need to assist by logging in directly.
Option 1 – You Create It From Your Personal Facebook Account:
1. Log into your personal Facebook account
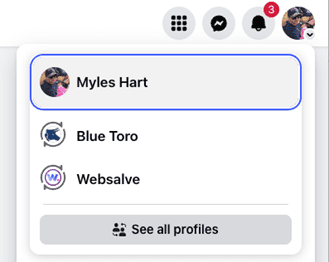
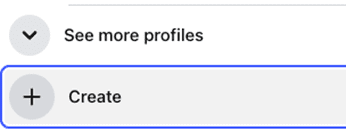
2. Click your profile picture (top right) and select "See all profiles"
3. Click “Create”
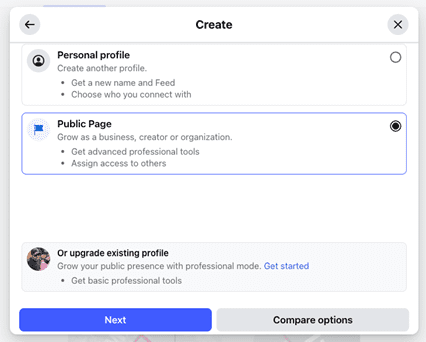
4. Choose “Public Page” and follow the on-screen prompts
Option 2 – Websalve Creates It Through Business Manager:
1. Websalve logs into our Business Manager
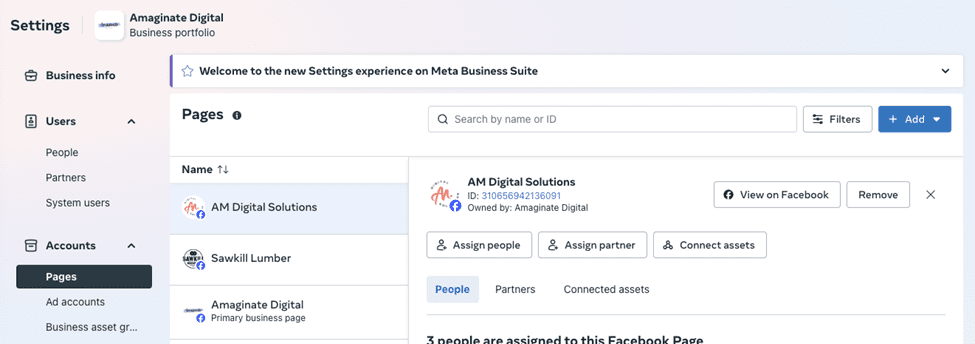
2. Navigate to “Business Settings” > “Pages”
3. Click the blue “Add” button, then select “Create a new Facebook Page”
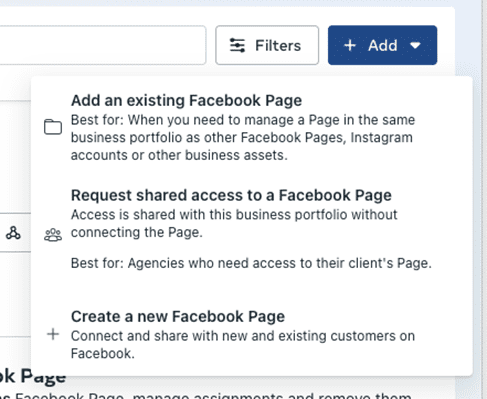
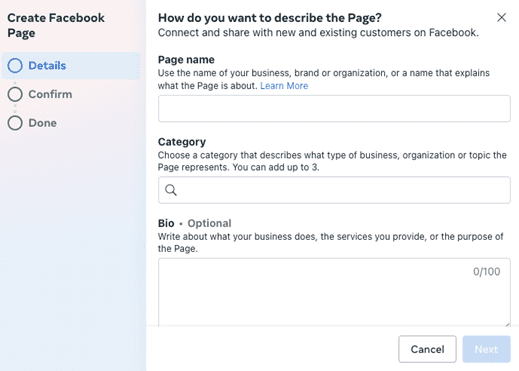
4. Complete the required details
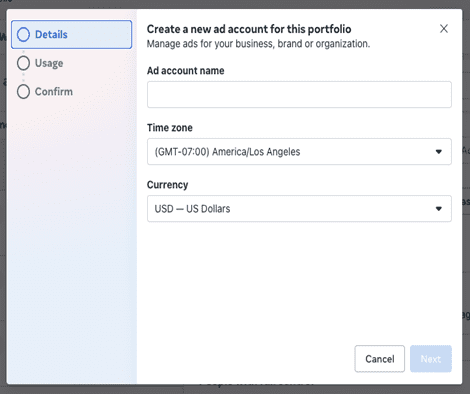
✅ Best practice: The Ad Account should always be created from your own Business Manager.
1. Log into your Business Manager
2. Go to “Business Settings” > “Ad Accounts”
3. Click the blue “Add” button
4. Choose “Create a new ad account”
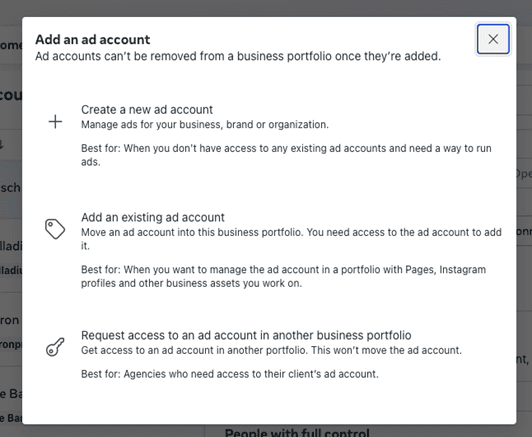
5. Follow the setup steps (⚠️ Note: You cannot change the currency after setup!)
We can assist in two ways:
This gives us access to help manage your Page and Ad Account securely.
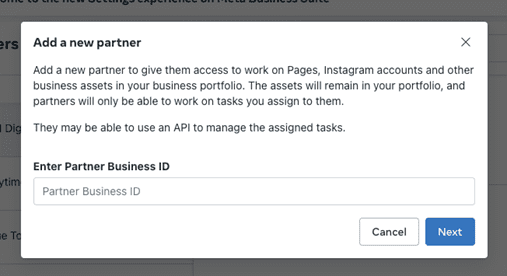
1. Go to Business Settings > Partners
2. Click the blue “Add” button
3. Select “Give a partner access to your assets”
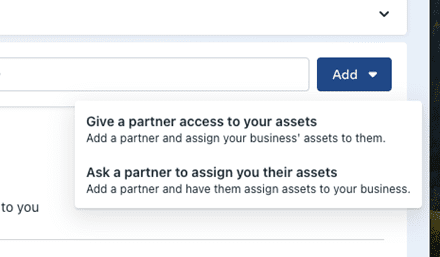
Enter Websalve’s Business ID: Business portfolio ID: 115761269453852
5. Assign access to your Page and Ad Account
6. Once done, we’ll accept the partnership on our end
If you're unable to post or boost content, you might need to adjust user permissions.
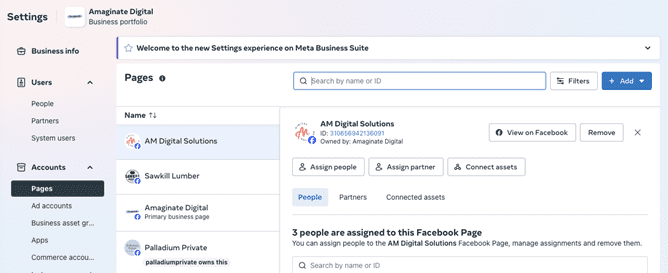
1. Open Websalve Business Manager
2. Go to “Pages” and select the relevant Page
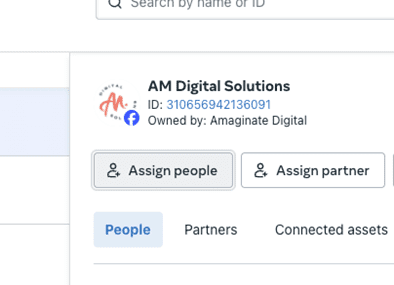
3. Click “Assign people”
4. Choose the team members you want to grant access
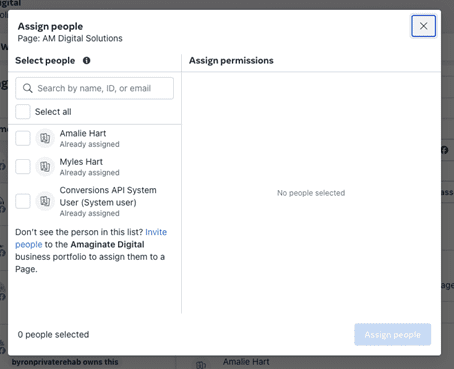
5. Click the blue “Assign” button
📢Repeat the same steps for Ad Accounts, under the “Ad Accounts” section in Business Settings.
Websalve is here to support you throughout this process. If at any point you need us to assist directly, we’re happy to:
🛠️ Let’s build your digital presence the right way — with safety, structure, and success in mind.